-Or a guide to budding-
August is the time of year we start to propagate our new fruit trees. A technique known as ‘budding’ , we thought you might like to know how it’s done – and maybe find out a bit about the skill, craftsmanship and patience that goes into that new fruit tree you might be thinking of planting.
This is a slightly condensed description of the process, it isn’t meant to act as a comprehensive guide to anyone considering trying their hand at propagating fruit trees; I consider it more a ‘tourists guide’ to enable them to have a greater understanding of some of the skills and practicalities involved. It is a complicated subject with a great many nuances and tiny details, which can make the difference between success and failure.
Budding is done during late Summer; August-September is ideal. It is known as budding because the new fruit tree will grow from just a single bud attached to a leaf stalk. A series of photo’s shows you the stages in production.
PHOTO 1
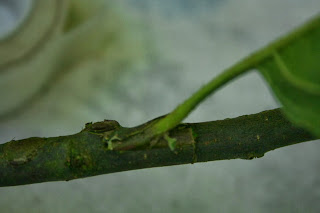
This is the bud – a single leaf-bud cut from a Cox’s Orange Apple tree. It still seems incredible that this tiny almost embryonic sliver will turn into a fully grown apple tree. Hopefully – this is a method that even in skilled hands, can yield just a 60% success rate.
PHOTO 2
The bud is inserted into the rootstock [here miniature M27] by cutting the bark of the rootstock first horizontally, and the vertically to create a ‘T’ shaped incision. If the bark does not cut easily and cleanly to reveal the green cambium layer beneath, the rootstock will be discarded and another selected to accept the bud. This is known as ‘slipping’; if the bark doesn't’t slip easily then the inner growth material will be too dry and the bud won’ take. There is only a brief window of opportunity in which to bud and this is why timing is so critical.
The bud is then gently slid into this cut in the bark. A very sharp and specialised ‘budding’ knife is required for this operation; great care is needed and there are many 3 fingered budding technicians here on the Nursery [LOL]
PHOTO 3
Quickly, before the bud has time to dry out, it is wrapped around with special budding tape, leaving just the eye of the bud exposed. Rafia, elastic bands have all been used successfully in the past, but we like to use grafting-tape. This process has to be done very quickly after insertion, even a slight delay may cause failure because the delicate bud is very prone to dehydration. Note the leaf-stalk has been cut off so it is just barely visible. The leaf stalk is only kept for handling purposes long enough for the bud to be inserted. It is cut away straight afterward because it would only lose moisture.
The completed graft is then put away somewhere quiet outdoors as it won’t do anything now until next Spring.
PHOTO 4
Then in May of next year a miracle happens. That tiny bud will produce a burgeoning new shoot that we then tie up straight and nurture. It will take a further 2 seasons for it to produce a saleable tree.
Provided the leaf bud is mature enough [but ONLY ever harvested from fresh new semi mature growth of that current season] and provided it is never allowed to dry out, that it is wrapped very securely and promptly, and that it is grafted on to a correspondingly acceptable rootstock [you can’t mix and match rootstocks and fruits] it will hopefully take.
I hope you find the above a fascinating account. We never tire of the process of budding [and grafting, which comes later] and it still seems like a miracle that it works at all!


No comments:
Post a Comment